
User Administration
Before running an analysis, an admin needs to configure user profiles, which includes user roles, permissions, group associations, and so on.
Click the Settings icon in the navigation bar and select Users from the left menu to open the Users page.
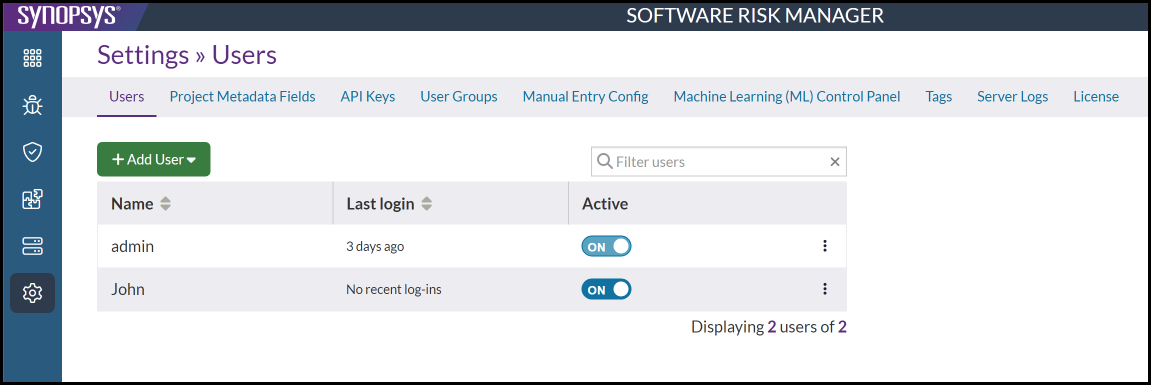
This page displays a list of current users, the date the user last logged in, and whether that user is active. Clicking the column headings will re-sort the list.
Viewing Existing Users
The User page allows you to view a list of existing users, the date of their last login, and whether they are active.
- Click the Settings icon in the navigation bar and select Users from the left menu.
This page lists each user, when they last logged in, and whether they are "active."
- Use the filter field to search for a specific user, or click the column headings to re-sort the list.
Adding a User
Admins can add three different types of users: Local, LDAP, and SAML (depending on your configuration).
- Click the Settings icon in the navigation bar and select Users from the left menu.
- Click Add User and select a user type. There are three user types:
- Local Users. Local Users exist only within Software Risk Manager. You pick a username and password for them. Software Risk Manager keeps their credentials in its database.
- LDAP Users. LDAP Users can be added to Software Risk Manager by their username, but their password is managed by an external LDAP server. When an LDAP user logs in, Software Risk Manager will send their credentials to that server in order to authenticate the user.
- SAML Users. SAML Users can be added to Software Risk
Manager by their username, but authentication is handled by an
external SAML provider. When a user reaches the Login page,
Software Risk Manager will redirect them to the Sign On Portal
of your SAML provider in order to authenticate the user. They
may see the standard Software Risk Manager Login page with a
link to sign in via SAML, depending on your configuration.
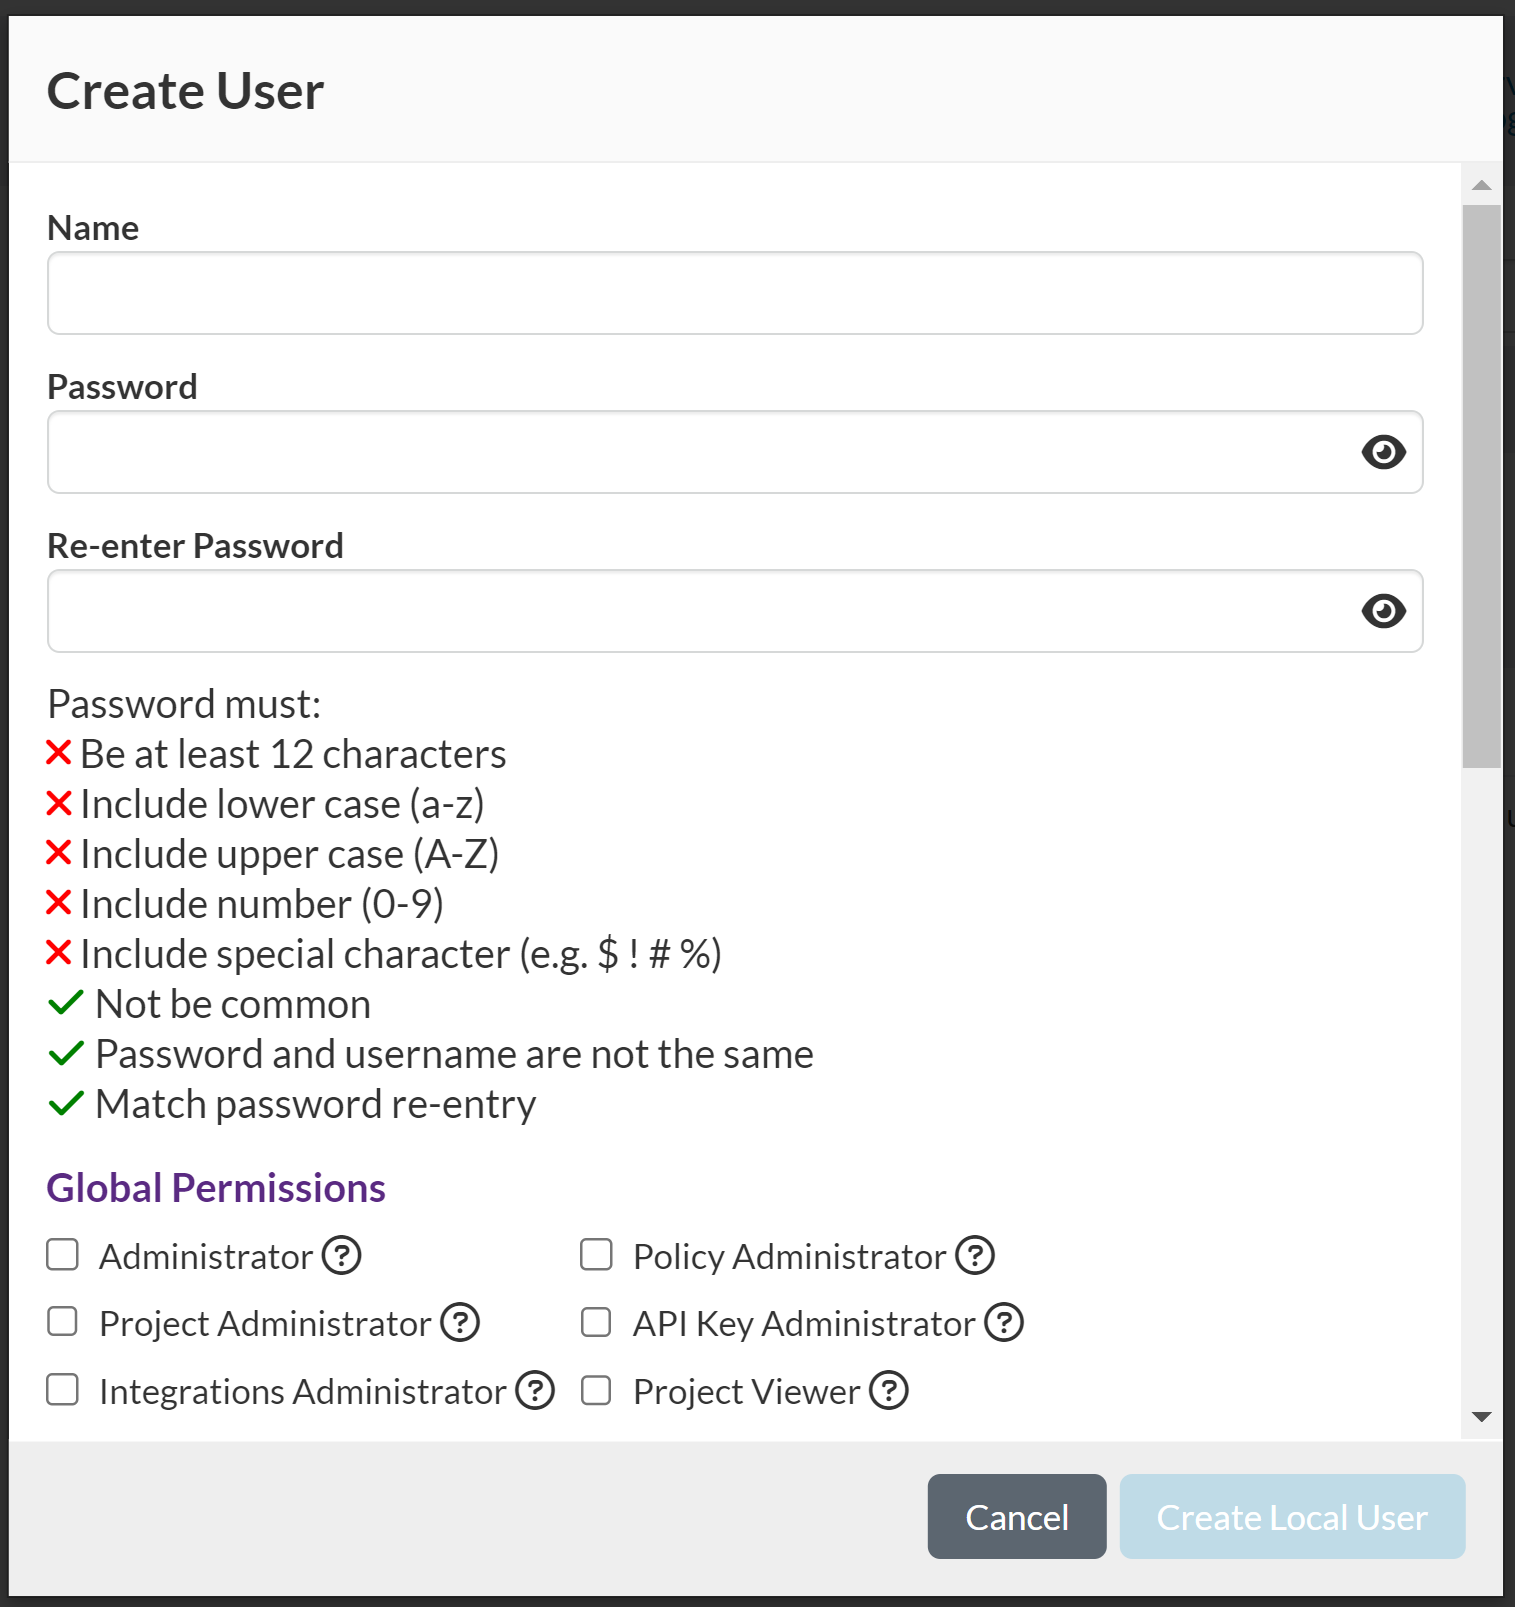
- Enter a name, password, and confirm the new password.
- Use the toggles to set global permissions for the user.
- Administrator. Grants user admin privileges. Admin users inherit all roles.
- Project Administrator. Allows the user to create a new project.
- Integrations Administrator. Allows user to manage centralized project configuration.
- Policy Administrator. Allows user to create polices.
- API Key Administrator. Allows user to manage API Keys.
- Project Viewer. Allows user to view all projects.
- Select which roles the user will have for each project.
- Read. The user or user group can see the specified project and all of its contents. If a user doesn't have the Read role for a particular project, that project will not appear in the Projects page for that user.
- Update. The user or user group can change the finding status and comment on findings for the specified project.
- Create. The user or user group can create new analyses for the specified project
- Manage. The user or user group can manage the specified project's configuration (e.g., Git, Issue tracker, etc.). The Manage role also allows the user to delete the specified project.
- Click Create Local User.
Configuring a User Profile
Configuration settings in a user profile determines how a user interacts with Software Risk Manager globally and what the user will be able to do on a project-by-project basis. Global permissions (or roles) include Administrator, Project Administrator, and Integrations Administrator. Next, users can be assigned specific roles for individual projects: Read, Update, Create, and Manage.
- Click the Settings icon in the navigation bar and select Users from the left menu.
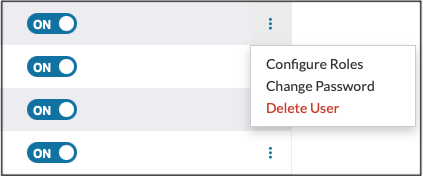
- Click the dropdown configuration icon to the right of the user name and
select Configure Roles.
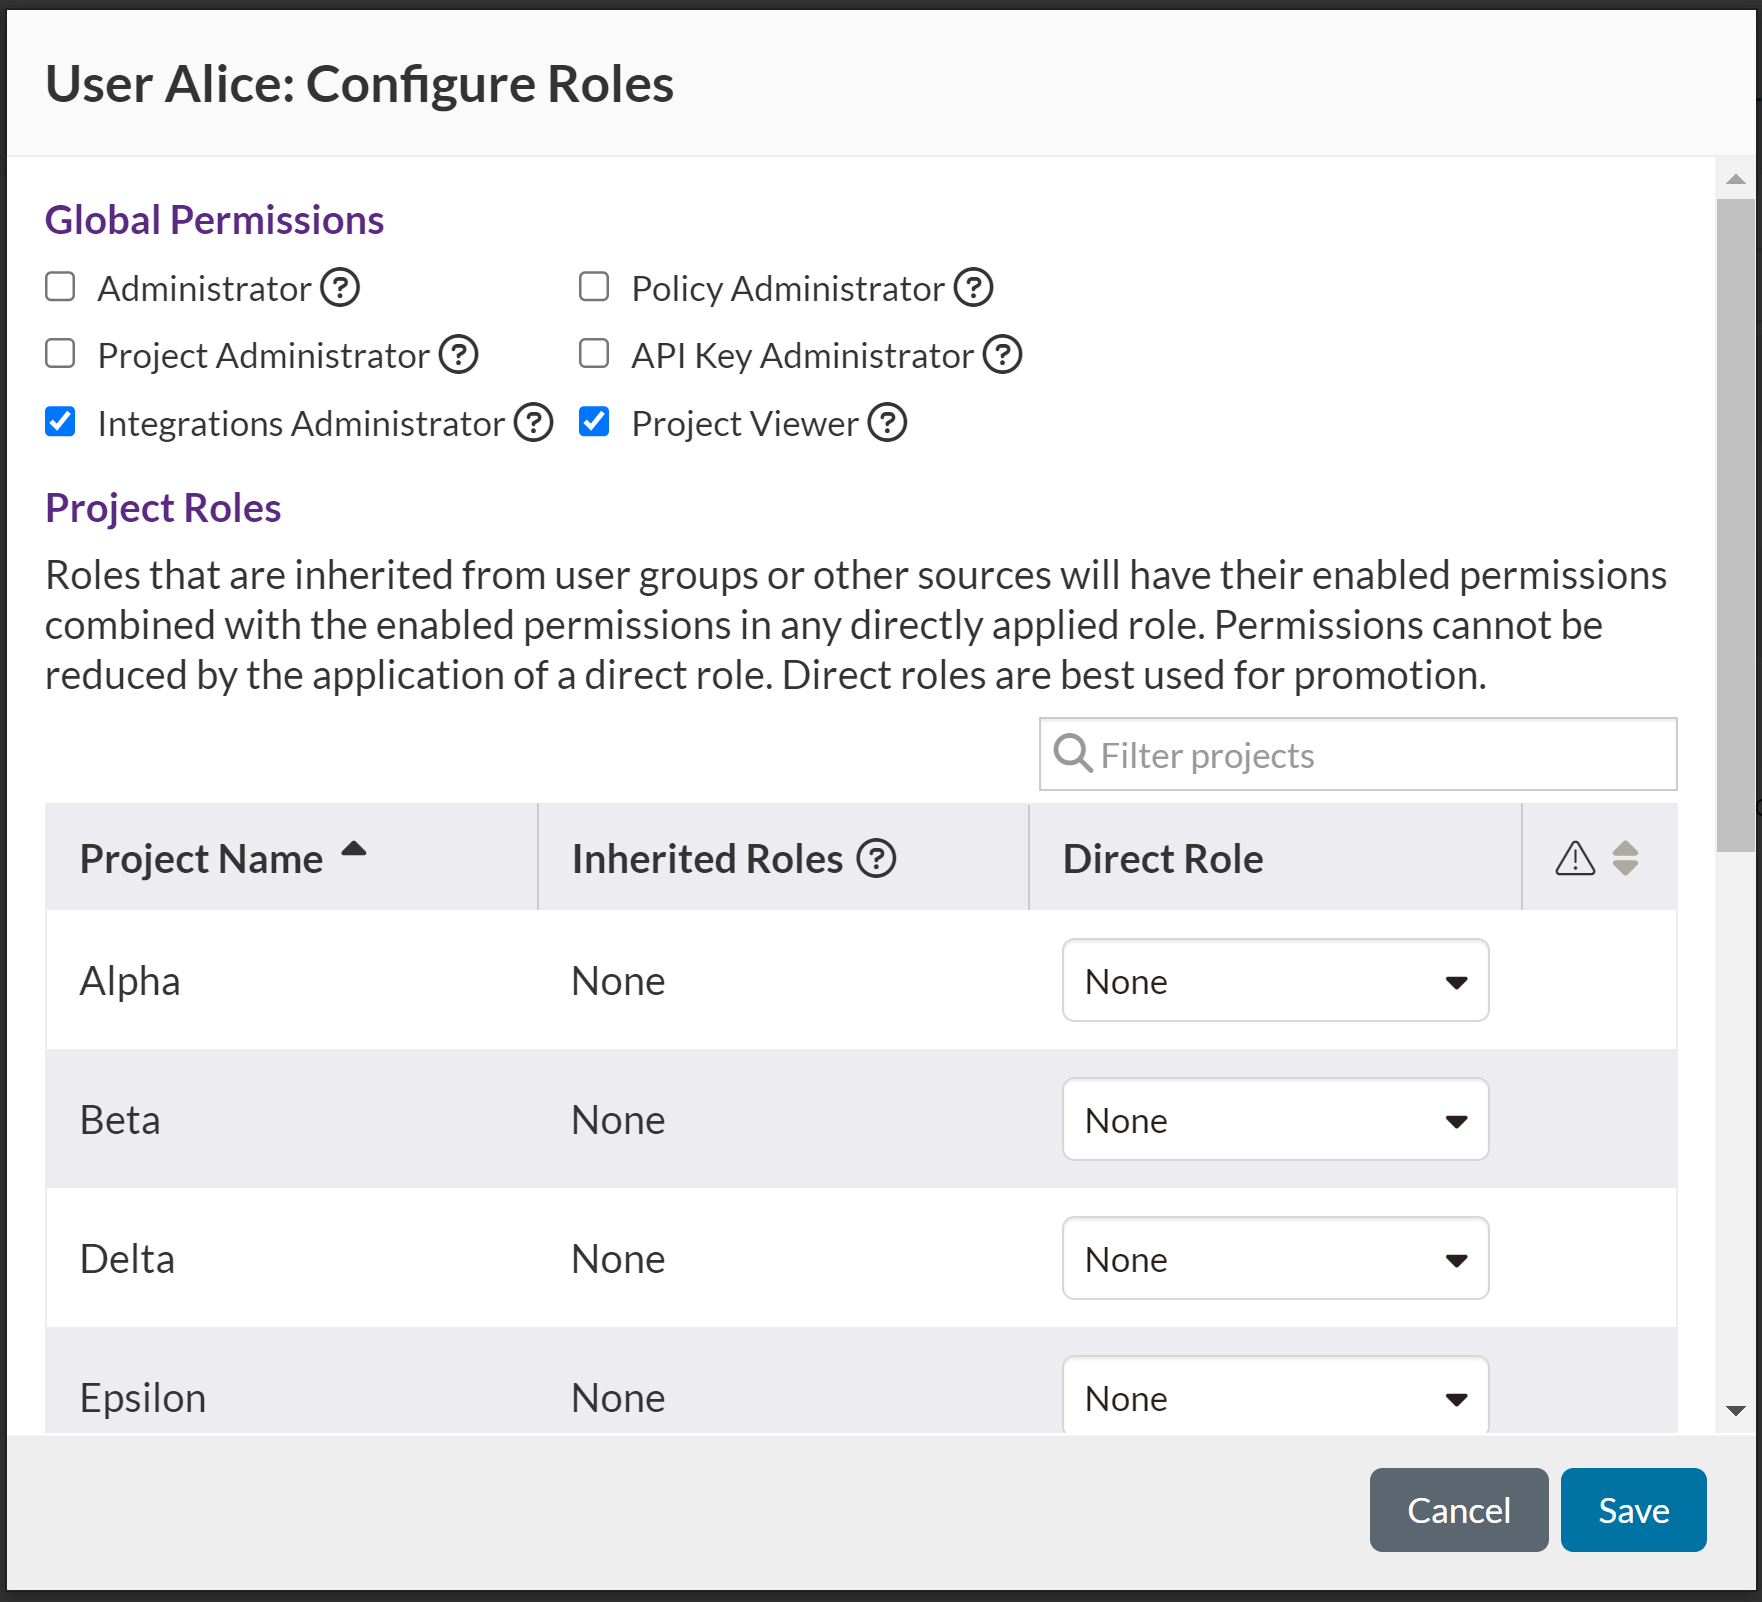
This opens the "Configure Roles" window.
- Configure user roles as needed.
Click on a role to select it. Click Clear to remove all selections.
Global Permissions. Select global permissions for the new user.- Administrator. Grants user admin privileges. Admin users inherit all roles.
- Project Administrator. Allows the user to create a new project.
- Integrations Administrator. Allows user to manage centralized project configuration.
- Policy Administrator. Allows user to create polices.
- API Key Administrator. Allows user to manage API Keys.
- Project Viewer. Allows user to view all projects.
Project Roles. Select permissions for individual projects.- Read. The user or user group can see the specified project and all of its contents. If a user doesn't have the Read role for a particular project, that project will not appear in the Projects page for that user.
- Update. The user or user group can change the finding status and comment on findings for the specified project.
- Create. The user or user group can create new analyses for the specified project
- Manage. The user or user group can manage the specified project's configuration (e.g., Git, Issue tracker, etc.). The Manage role also allows the user to delete the specified project.
- Click Save.
Changing a User Password
Admins can change the password of any user. (Users can change their own passwords on the My Settings page. See Changing Your Password.)
- Click the Settings icon in the navigation bar and select Users from the left menu.
- Click the dropdown configuration icon to the right of the user name and
select Change Password.
This opens the change password window.
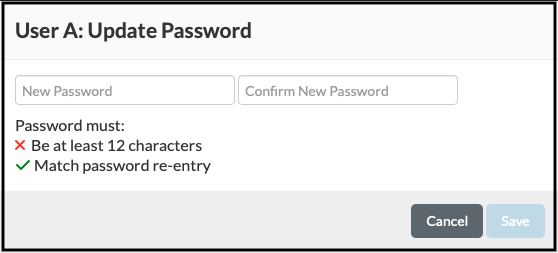
- Enter and confirm the new password.
Passwords must be at least 12 characters.
- Click Save.
Deleting a User Profile
Admins can delete one or more users.
- Click the Settings icon in the navigation bar and select Users from the left menu.
- Click the dropdown configuration icon to the right of the user name and
select Delete User.
- Click Delete to confirm.