Aqua SaaS Configuration
For Aqua Enterprise on-prem deployment, the connector only requires giving credentials for an Aqua user with the necessary permissions. However, in an Aqua SaaS instance, the process of getting the necessary credentials for the connector is more complicated. In this case, Aqua SaaS requires creating a permission set, role, and an access token, as shown below.
- Log into cloud.aquasec.com.
- Create a permission set:
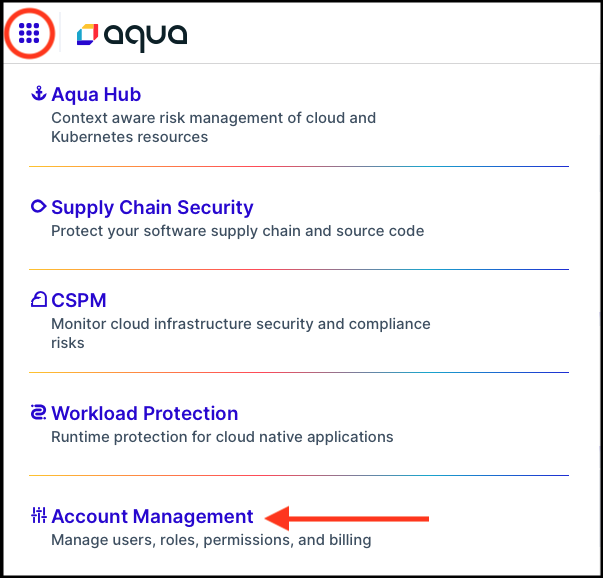
- Click the applications icon located in the top left corner and select
Account Management from the dropdown menu.

- Select User Management > Permission Sets from the left menu.
- Click "Add Permission Set" and enter a name in the Name field.
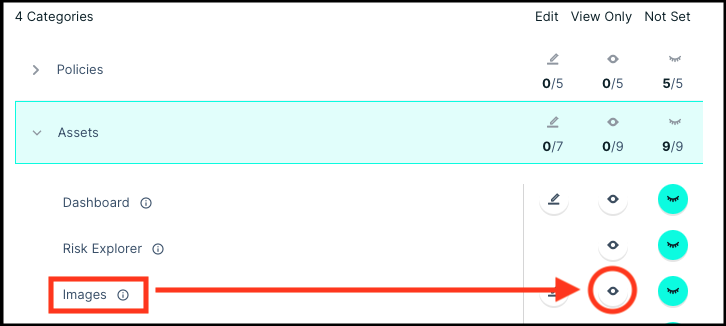
- Expand the Assets category, locate "Images," and enable "view" by
clicking the corresponding icon.
This is needed for access to images.

- Expand the Compliance category, locate "Vulnerabilities," and click the
view icon.
This is needed for access to vulnerability reports on a finer, per-image-layer basis.
Note: (Optional) SRM will detect when this permission is unavailable and alter its logic appropriately. - Click Save.
- Click the applications icon located in the top left corner and select
Account Management from the dropdown menu.
- Create a role and assign the previously created permission set:
- Select User Management from the left navigation menu and click Roles.
- Click Add Role.
- Enter a name in the Name field, select a permission set, and select an application scope.
- Click Save.
- Create an API Key:
- Select Settings from the left navigation menu and click API Keys.
- Click Generate Key and save the API Key and Key Secret.
- Click the configuration icon to the right of the new API Key and select Edit.
- Disable "Global Permissions."
- Enable "roles:assign", "tokens:readwrite", permission (needed to
authenticate with token).Note: For "tokens:readwrite", give it permission to use the role created previously.
- Click Save.
The role name from step 3 is used for the “Role Names” connector form field. The API Key and Key Secret from step 4 are used in the “API Key” and “API Key Secret” connector form fields.
