Job Configuration
The first thing you should do is configure your Jenkins Job to publish to Software Risk Manager. Instructions for Freestyle and Pipeline projects are fairly similar; a note on configuring for Pipelines projects can be found below.
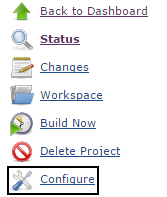
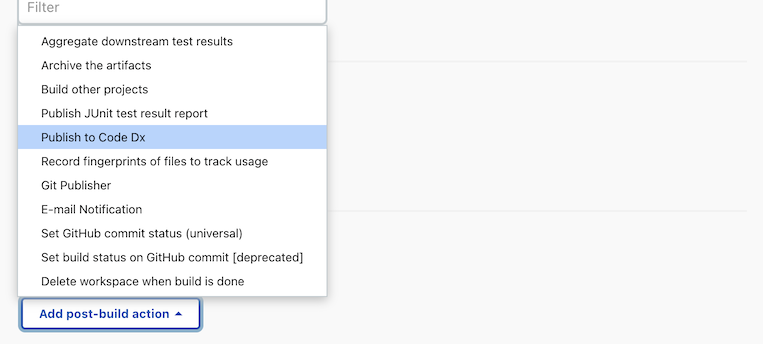
This is accomplished on the configuration page by going to Post-build Actions (toward the bottom) and selecting the Publish to Code Dx option from the Add post-build action button.
You can use the new action to setup different options related to Software Risk Manager.
Publishing
The Server URL, Server API Key, and Code Dx Project fields are
required for publishing. Ask your Software Risk Manager administrator to generate
the server API key that has the create
role for the project it needs to interact with.
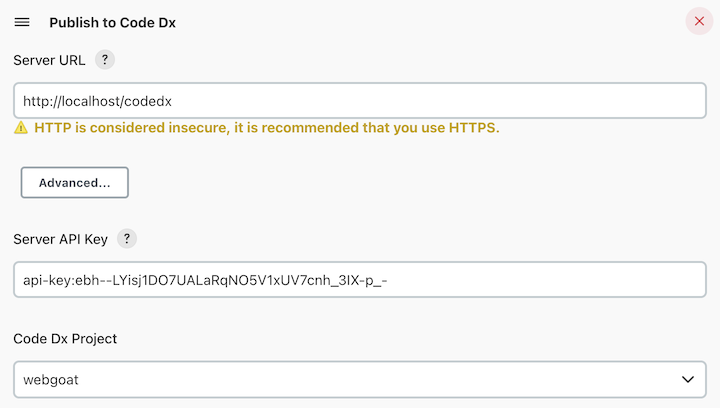
It is highly recommended that you specify an HTTPS URL, since using HTTP is insecure. If you receive a warning regarding an invalid certificate, refer to the section on self-signed certificates.
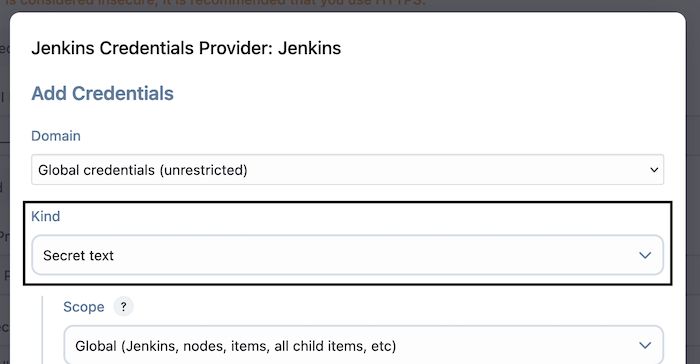
The Server API Key must be stored in Jenkins as a "Secret Text" credential accessible to the Jenkins project.
Once the Server URL and Server API Key fields are populated, the Code Dx Project dropdown can be used to select the Software Risk Manager project which will receive analyses. This dropdown has the options "Specific Project" and "Named Project".
The default option, "Specific Project", provides a simple dropdown for selecting an existing project in Software Risk Manager. The exact, selected project will always be used when publishing results from the job, even if the project is renamed.
The "Project Name" option allows you to specify a Software Risk Manager project by name. This must resolve to exactly one SRM project when the Jenkins job runs, otherwise the job may fail.
The "Project Name" option also offers a "Auto-Create Missing Projects" field option, which allows the plugin to create the project in Software Risk Manager if it does not yet exist. If using Software Risk Manager version 2022.4.3 or later, the default branch for the new project will be set to the "Base Branch" (see below) if specified. Note: The API Key must have either the "Administrator" or "Project Administrator" role to create projects.

The Source and Binary Files field allows you to identify the files in the job
workspace for Software Risk Manager to analyze. The format of this field is a
comma-separated list of Ant glob file location patterns. You can populate this list
by specifying the files (relative to the workspace) that will be sent to Software
Risk Manager. By default, this field is set to ** (all files).

The Include Git Source option can be used to have Software Risk Manager download the latest content from the Software Risk Manager project's configured Git source as part of the analysis. Bundled tools will be ran on this content as usual.
You can use the field "Specific Branch Name" to change which branch is fetched. If left empty, the default branch for the project will be used.

In addition to generic listing formats, Software Risk Manager supports importing the results of more than 100 commercial and open source analysis tools. This importing feature is defined in the Jenkins plugin through the Tool Output Files field, where you specify a comma-separated list of the paths and filenames of each output file. These paths should be relative to the job workspace.

Software Risk Manager users have access to the "First Seen by SRM" and "Last
Modified" filters on Software Risk Manager's Findings page. Each analysis in those
filters can have an Analysis Name, which is directly related to the Analysis
Name field in Jenkins. The Analysis Name field lets you set a "name"
for each Software Risk Manager analysis published from Jenkins. You can use
build/environment variables to construct a different name for each analysis. For
example, Build #${BUILD_NUMBER} creates the analysis name "Build
#26" for the 26th build of the project. You can construct links using a syntax
similar to markdown, i.e., [link text](link url). This also works
with build variables: Build [#${BUILD_NUMBER}]($BUILD_URL). Some
Jenkins plugins, like the Git plugin, provide "macros" which allow for some
additional customization. In this example, the analysis name will be set to the
first eight characters of the git commit hash: ${GIT_REVISION,
length=8}. For more information about "macros", see the Token Macro Plugin Wiki. Note: the
analysis name feature is only supported by Code Dx versions 2.4.0 and up. If the
server you plan to publish to is older than version 2.4.0, the analysis name
will be ignored.

The Target Branch and Base Branch options allow you to set which branch will be used when storing results in the Software Risk Manager project. The Target Branch typically matches the branch currently checked out in the Jenkins build, but this isn't a requirement. If the Target Branch is not defined, results will be stored in the project's default branch.
If the Target Branch doesn't exist yet, it will be created in Software Risk Manager using the given Base Branch as its parent. The Base Branch is only used for creating new branches, and can be left empty if the Target Branch already exists.
The Target Branch and Base Branch fields only affect data storage within Software Risk Manager and do not affect the Jenkins build. When Failure or Unstable conditions are configured in the Jenkins plugin, findings will be fetched from the Target Branch to validate those conditions (or the default branch if unspecified).
Note: while branching was added in Code Dx 2022.4.0, this plugin requires 2022.4.3 or later when using the branching feature. If the server you plan to publish to is older than version 2022.4.3, the Target Branch and Base Branch fields will be ignored.

The Error Handling field lets you change plugin behavior when an error occurs during communication with the Software Risk Manager server. This behavior is applied if there are connection issues or the analysis fails, but is not applied for configuration errors such as an invalid Software Risk Manager project.

In the Advanced Options section, which is located at the bottom, you may specify source and/or binary locations to exclude from the analysis.

Clicking the Advanced... button will allow you to enter the files you would like to exclude from the build. These files are also Ant glob patterns.

Handling a Self-Signed Certificate
If the server hosting Software Risk Manager is using a self-signed certificate, you'll receive a warning:

Clicking the Advanced button will allow you to populate the Self-Signed Certificate Fingerprint field with the SHA1 fingerprint of the self-signed certificate used by the server. Contact your Software Risk Manager administrator for the correct value. Or you can navigate to your installation of Software Risk Manager in a browser, and obtain the fingerprint by following the instructions for your particular browser:
Chrome: Click the lock icon or "Not secure" message next to the URL. If the connection is not secure, click the "Certificate is not valid" section to display a pop-up window. Otherwise, if the connection is secure, click the "Connection is secure" section and then the "Certificate is valid" section to display a pop-up window. The SHA1 Fingerprint can be found near the bottom of the pop-up window.
Edge: Click the lock icon or "Not secure" message to the left of the URL, click on the section "Connection is/isn't secure", and click the certificate icon at the top-right of the window. The SHA1 Fingerprint can be found near the bottom.
Firefox: Click the lock icon next to the URL, click the section "Connection (isn't) secure", and click the More information button. In the new window, click the "View Certificate" button which will open a new tab. The SHA1 Fingerprint can be found in the "Fingerprints" section.
Safari: Click the lock icon next to the URL, click Show Certificate, expand the Details section, and the SHA1 Fingerprint can be found near the bottom.
Once you have the correct fingerprint, populating the Self-Signed Certificate Fingerprint field will allow you to proceed.

Waiting for Analysis Results
When performing an analysis, the Jenkins Software Risk Manager publisher will zip up the specified workspace files and send them to the Software Risk Manager server. By default, Jenkins will not wait for the results of the analysis.
In some cases you will want to wait for the analysis to complete so you may consider the Jenkins job a success or failure. To take this even further, a team may also want the resulting Software Risk Manager analysis data to influence the state of the build. Additionally, you may want to see a summary of the Software Risk Manager build and analysis results within Jenkins, including the resulting Software Risk Manager tables and graphs. This is all possible by selecting the Wait for Analysis Results checkbox.

Upon enabling this option, a new set of fields will be shown on the configuration page. These fields are categorized into three sections: Policy Behavior, Build Failure Conditions, Build Unstable Conditions, and Graph Options.
Policy Behavior
The Software Risk Manager Jenkins plugin can check the project for policy violations after the analysis has completed and then change the build result if there were violations. For a policy violation to affect the Jenkins plugin, the violations must meet the following conditions:
Be associated with the Software Risk Manager project
Have at least one rule where the action is set to "Break build"
Meet the "fix by" criteria of that policy rule
Have a violation of that specific rule
The "'Break build' Action" field allows you to change the build result that is used when the conditions listed above are met. However, when set to "No Action," the plugin will not check for policy violations.
See the section on Policy Configuration in the Software Risk Manager User Guide for more information.
Note: the Policies feature is only supported by Code Dx versions 2023.1.0 and up. If the server you plan to publish to is older than version 2023.1.0, the field will be ignored.

Build Failure Conditions
The Build Failure Conditions section allows you to configure the requirements
upon which the build will be considered a failure. It is important to note that not
all findings will be included in this check. By default, only findings with a status
of Assigned, To Be Fixed,
Reopened, and Unresolved will be considered.
To only check findings created during the current build, you can select the Only
Consider New Findings checkbox.

The severity dropdown specifies the range of severities that will cause the build to fail. That is, the build will be considered a failure if one or more findings are detected with the selected severity range.

Build Unstable Conditions
The Build Unstable Conditions section is identical to the previous section, but configures the requirements upon which the build will be considered unstable. The severity dropdown has the same options as the Build Failure Conditions section.

Graph Options
The Software Risk Manager Jenkins plugin will show some helpful graphs on the Job and
Build pages when the Wait for Analysis Results option is enabled. The number
of datapoints in these graphs is configurable using the Number of Builds in
Graph field. To show an unlimited number of datapoints, set this field to a
value less than 2.

Configuring for Pipelines
When configuring your Pipeline project, use the Snippet Generator to easily create a command.
In older versions of Jenkins this can be found at the bottom of the Configuration page for the project.
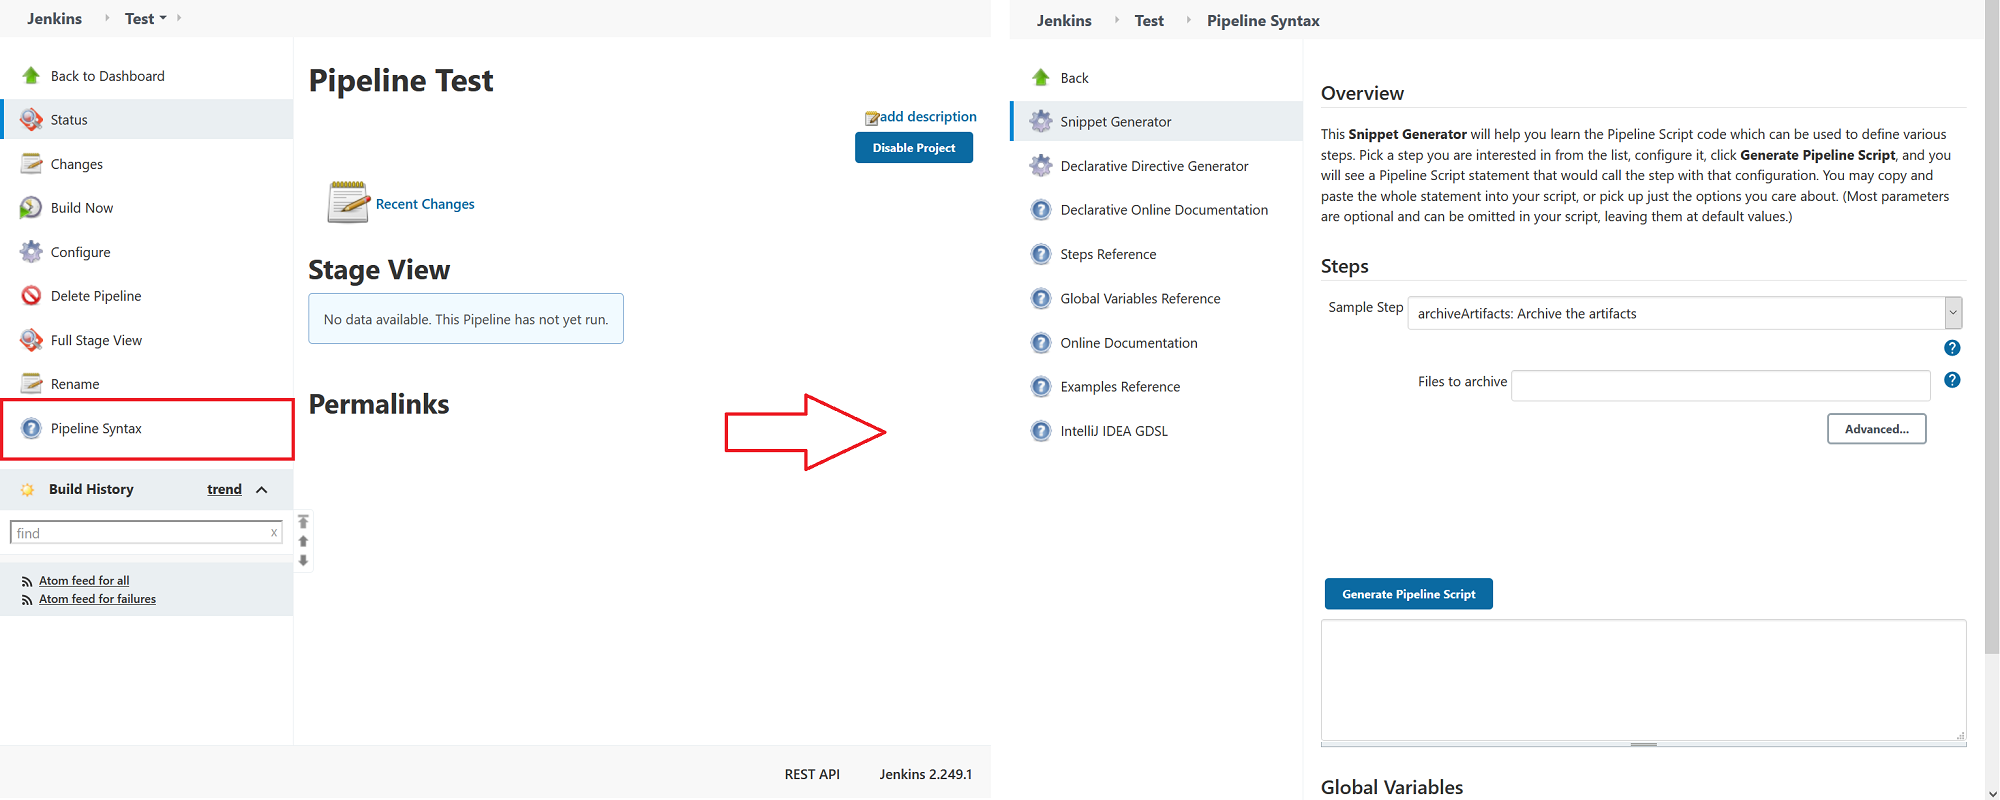
In newer versions, it's labeled as "Pipeline Syntax" in the menu on the left, containing other project options.
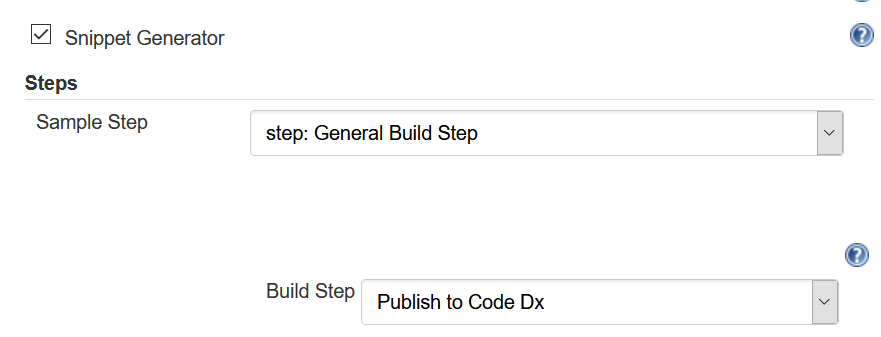
Set the "Sample Step" to "step: General Build Step", and change "Build Step" to "Publish to Software Risk Manager".
Once selected, you will be given the same configuration options as listed in the previous sections. Behavior of the Pipeline plugin is the same as the Freestyle one. Customize these options as necessary and click "Generate Pipeline Script" to create a snippet you can use in your pipeline.
